Showing posts with label craft ideas. Show all posts

Monday, January 16, 2017

In January, Why Not...

... add bubble wrap to a painting activity?


(Can you tell which story inspired this month's art?)

... recycle plastic milk bottles and caps to make frosty friends?


... and learn about the life, goals, and dreams of a very special American?


Happy January!

Tuesday, February 26, 2013

Truffula Tree Tutorial

Students love to celebrate Dr. Seuss' birthday!  Listening to favorite stories by guest readers, making Cat in the Hat crafts, speaking in rhyme, and enjoying green eggs and ham and gummy "hats" as snacks are activities that typically fill the week as students nationwide remember Theodor Seuss Geisel.


(source here)

Truffula trees are a favorite decor element from The Lorax.  Long stalks/trunks with yellow and black stripes and colorful, fluffy tops can be found on many bulletin boards and classroom doors as well as decorating school programs and libraries.

I've found several tutorials online for making truffula trees, using items such as pool noodles or heating insulation, but I wanted to use items that had been donated to our class over the past few months.  Affordable, lightweight, and easy to store, these trees could also be happily adopted by students or families planning a Seuss themed birthday party.

You'll need the cardboard tubes from wrapping paper, double sided tape, black crepe paper rolls, yellow tape, tissue paper, pipe cleaners, a hole punch and scissors:


Put a piece of double-sided tape at the end of a cardboard tube:


Then add a strip of double-sided tape down the length of the tube (be careful, it sticks to everything):


Press the end of your crepe paper onto your first piece of tape:


Wrap the crepe paper around the tube, gently pulling it taut and making sure all of the cardboard surface is covered.  The long strip of double-sided tape will hold the crepe paper in place as you roll/wrap.  A word of caution: you'll likely end up with blue-ish black fingers thanks to the bleed-through of the crepe paper. 


When you've covered the tube, leave a bit of crepe paper at the end to tuck up inside:


Wrap yellow tape around the tube to create stripes:


You can use large butcher paper to create the tuft for the top of the tree or you can fold layers of tissue paper (I used 6 sheets per tuft) fan-style, tying a pipe cleaner around the middle, to make a more dimensional top:


I cut the edges:


... and carefully separated the layers:


To attach the tuft to the trunk, I punched two holes at one end of the tube and anchored the ends of the pipe cleaners through them:


Oh truffula tree, oh truffula tree, how lovely are thy tufts...


*****

Do you know of any other Seuss-inspired tutorials that readers would enjoy?  Link us up in the comments!

*****


Tuesday, February 19, 2013

Q is for...

Q-Tip painting:


...and quilts (we read The Quilt by Ann Jonas before designing our own):


Some of our favorite Qq words:


quilt     quick     quack     quibble     queen     quiet     quarter     quicksand

*****

Here are links to:


Mama Miss' The ABC's of Printables page (letters P to T)- a FREE (and very cute) printable

... and a letter Qq path of motion tracing page

*****


Sunday, October 07, 2012

B is for Birds

.... and blurry, apparently:

Bforbirds1

Uppercase b's were cut from black construction paper, then glued to brown, with orange brows and a beak (little talons too!) accenting big white eyes.  White feathers were drawn onto the bird's belly with a crayon.

One student was absent the day we made our birds- the others are looking forward to her owl joining them soon!

:)

*****

There's a lot of debate about whether students' creative activities should focus on the process or the product.  While I believe artistic expression should be encouraged at all ages and not be falsely addressed by "canned" art projects, I also know that fine motor skills have to be developed and tools must be introduced to children, often with safety in mind first.  Processing skills include following step by step directions, keeping track of materials and tools, observing and tracking parts of a whole, and learning new techniques that can be used again later.  When teaching young children, creative endeavors can be about both the process and the product with ample opportunities for students to express themselves freely in creative construction zones, art centers and elsewhere.

*****

Saturday, October 06, 2012

Trick or Treat...

Usually my aide and I paint my Stars' feet with white paint, making Halloween ghosts for classroom decor.  This year, we couldn't resist playing with the silly greeting:

smellmyfeet 3 final

smellmyfeet2 final

White paint on the heel, yellow on the arch, and orange near the toes turned the Stars' feet into candy corn:

smellmyfeet door 2

The giggles from the tickles were worth it!

smellmyfeet final

*****


Sunday, August 21, 2011

Classroom Clothespins

My students have several locations throughout our room where we chart, graph, and tally information daily.  Sometimes they'll write their names or make a mark to answer questions posed on chart paper or our markerboard, and other times they'll clip clothespins to appropriate sections of whatever chart we might be using for survey info. These clips have their names on them.

Thanks to prior hand injuries, it's difficult for me to write legibly when I print small letters on narrow surfaces.  Hooray for printers, scissors, wooden clothespins and Mod Podge!

First I print out my students' names twice, making sure the ink has time to dry completely:

Photobucket

Then I clip clothespins to some cardstock to keep them from rolling.

Photobucket

I trim the paper so each name fits on the longer wooden section of the clothespin:

Photobucket

Paint a thin layer of Mod Podge across the clip where the name will be adhered:

Photobucket

Then press the name onto the clip, smoothing out any air bubbles.  Be careful not to smear the ink on the paper:

Photobucket

Paint a thin layer (okay, so it looks globby and opaque- never fear, it will dry clear) over the paper and let it dry before flipping the clip over and repeating the process on the back:

Photobucket

These particular clips will be used on our class lunch chart, so that students, visitors and I can indicate whether we're having school lunch or home lunch each day.

Photobucket

Though these are plain (fabulous for name recognition), these clips are easy to "prettify" if you'd like.

Here I've clipped some scrapbook paper:

Photobucket

Photobucket

... and I've topped them off with star buttons, using the wonder adhesive, E-6000:

Photobucket

Once dry, you can add magnets to the back of each clip if you'd like to use these on magnetic surfaces.  The Mod Podge dries VERY quickly, but the E-6000 should be allowed to dry overnight.

*****

~ Pin and Paper offers another great clothespin tutorial here...

~ ... with Creature Comforts offering creative clippy goodness here...

~  Scroll all the way through Mama's Little Monkey's tutorial for a fun stamping idea for clothes pins... I'm thinking SIGHT WORDS!

~ If you're a crafter, you know holiday gifts must be made early!  Here's a fabulous Christmas card display idea using.... yep, you guessed it....craftyified clothespins.

*****

How do you fill your students' learning areas with print?

Sunday, October 31, 2010

Teacher, Why Do You Always Paint Our Hands?

It was *the* question of the week!

"Mrs. Sommerville, you're weird.  You painted our hands for autumn trees.  Then you painted our feet for Halloween ghosts.  Now you're painting our hands again for Thanksgiving turkeys.  What color are we going to have to paint our hands (insert eye roll from five-year-old here) for the next holiday?"

Well... uh...

Hmm.

I assure you, I don't *always* paint my students' hands.  Sometimes I let them get sticky in other ways:


Okay, okay, so they painted first, but then they got all goopy painting white glue onto pumpkin templates cut out of old manilla folders.  I added the pipecleaner "vine" onto the pumpkins with a hot glue gun after school.

November means it's time for patchy pumpkins, terrific turkeys, and venerated veterans, so I'll post photos of the finished bulletin board later this week!
Photobucket

To answer my student's question:  brown.  I'll be painting hands (and possibly feet) brown next month.  


So there.

Wednesday, April 21, 2010

B is for Beautiful Butterflies


*****

~ Ramblings of a Crazy Woman shares a similar painted butterfly project...

~ Miss Fancy Pants and Staci Taylor share how-to's for making a room sign with pretty paper butterfly die cuts...

~ Marie shares instructions for a simple tissue paper butterfly craft over at Design Mom...

~ ... and for your pocket chart:

Butterfly, Butterfly
(as posted at Teachers.net by Jill/K/OK)


Butterfly, butterfly, fly away.
Butterfly, butterfly, don't delay.
Butterfly, butterfly, fly so high.
Butterfly, butterfly, touch the sky.
Butterfly, butterfly, turn around.
Butterfly, butterfly, touch the ground.
Butterfly, butterfly, quick as a wink.
Find a (color) flower and stop to drink.

Sunday, April 11, 2010

Birthday Crowns

This year I have quite a few "spring babies" in my class. We've been celebrating birthdays every week (with more to come) and enjoying cupcakes, birthday cookies, and singing our birthday song both with and without the optional "cha-cha-cha's." With smiles and vigorous nods, I've so enjoyed kiri8's latest post at Elbows, Knees, Dreams, "Cha Cha Cha" and Halpey's post about his own students' crowning glory over at Look At My Happy Rainbow.

Birthdays are special. Crowns are cool. Don't forget they also come in handy for Fairy Tale Dress Up Days or other academic and fun-time celebrations, story retellings and imaginary play!

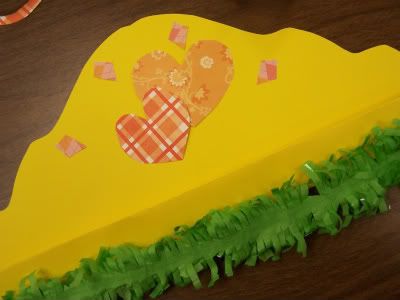
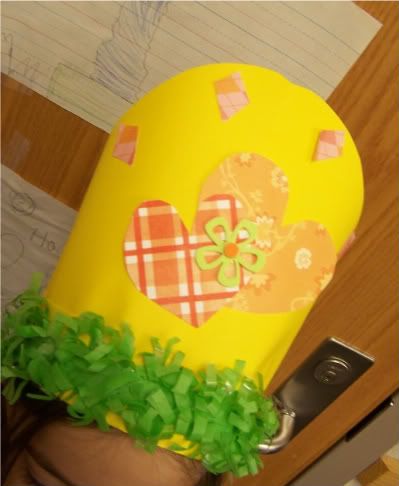
You can purchase pre-made crowns or make your own. Many teachers allow their students to decorate their crowns using construction paper, markers, paint, stickers, and foamies, but I also like to add fiesta fringe or holiday sparkle garland when my Stars want that little something *extra*:

Photobucket
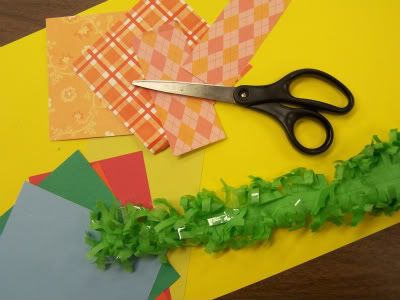
My students choose the color of construction paper, fiesta fringe, scraps of wallpaper or scrapbooking paper that they'd like to use, though they also really enjoy using magazine clippings of their favorite toys, foods, or pictures.

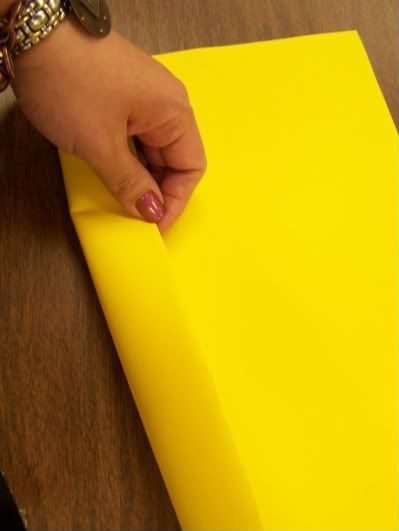
I use one of the large rectangular pieces of paper (12X18?) for the crown with a bit extra stapled at the back for size adjustment. I fold up the bottom long edge of the paper twice to made the headband...
Photobucket

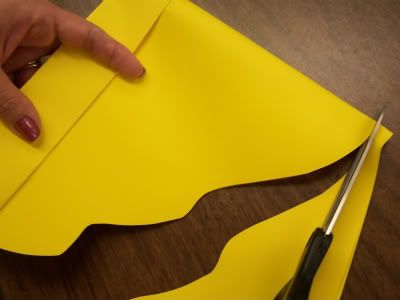
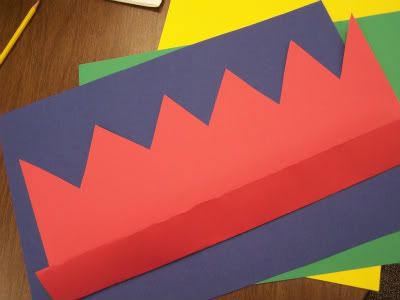
...and then fold the crown in half, cutting off the top edge. Girls tend to like the wavy top, while boys like the sharp pointy edges a la Max in Where the Wild Things Are:

Photobucket

Photobucket

Cut out shapes and designs, adhere stickers, and glue everything to the construction paper, stapling or hot gluing the fiesta fringe/garland along the bottom edge (**hint** staple the fiesta fringe or size-extender so that the prongs of the staples come through the front of the crown, NOT the inside where they can scratch your student's forehead):

Photobucket

Don't forget the birthday boy's or girl's name and new age:

Photobucket

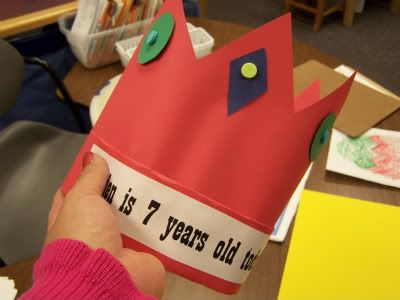
...and watch your student beam with pride as s/he is recognized throughout the school as the special Birthday Student!
Photobucket

*****

Pre-made birthday crowns:

... at Oriental Trading Company

...at Carson Dellosa

...and downloadable and printable crown templates at First Palette!