Showing posts with label teacher tip. Show all posts

Thursday, November 19, 2015

Quick Tabletop Easel

For Open House, my Stars made traditional handprint turkeys for their families.  Since our walls are decorated with Veterans Day art, patterned maize, and harvest pumpkins for November, we had no space left to display the great gobblers.  Simple desktop easels to the rescue!

I cut four inch wide, twenty-four inch long strips of tagboard, and then folded each strip as shown, with three sections seven inches long, and a tab three inches long to fold over the edge:


After folding, I applied tape so the tagboard would keep its shape.  Our handprint turkeys, not being very heavy, easily leaned against the tagboard, but I stuck some tape behind them to keep them from sliding off or wibble-wobbling.


Our turkey art measured nine inches by nine inches, and these easels worked great!


My Stars also left their math and ELA journals at their desks for families to look through before they toured the rest of the room. 

*****

My Super Stars love crowns and hats!  Click here for last year's post about our turkey headgear!


Sunday, July 12, 2015

Recycling Old Crayons: A Tutorial

My Super Star families purchase two packages (each) of crayons to last their children through the year, pack #1 being opened nice and fresh on the first day of kindergarten, and the second pack ready and waiting when students return from winter vacation.  Instead of tossing the broken, old, or barely used crayons, I recycle them, typically in two batches, once in the summer and then again as we learn about reducing, reusing, and recycling in the spring.

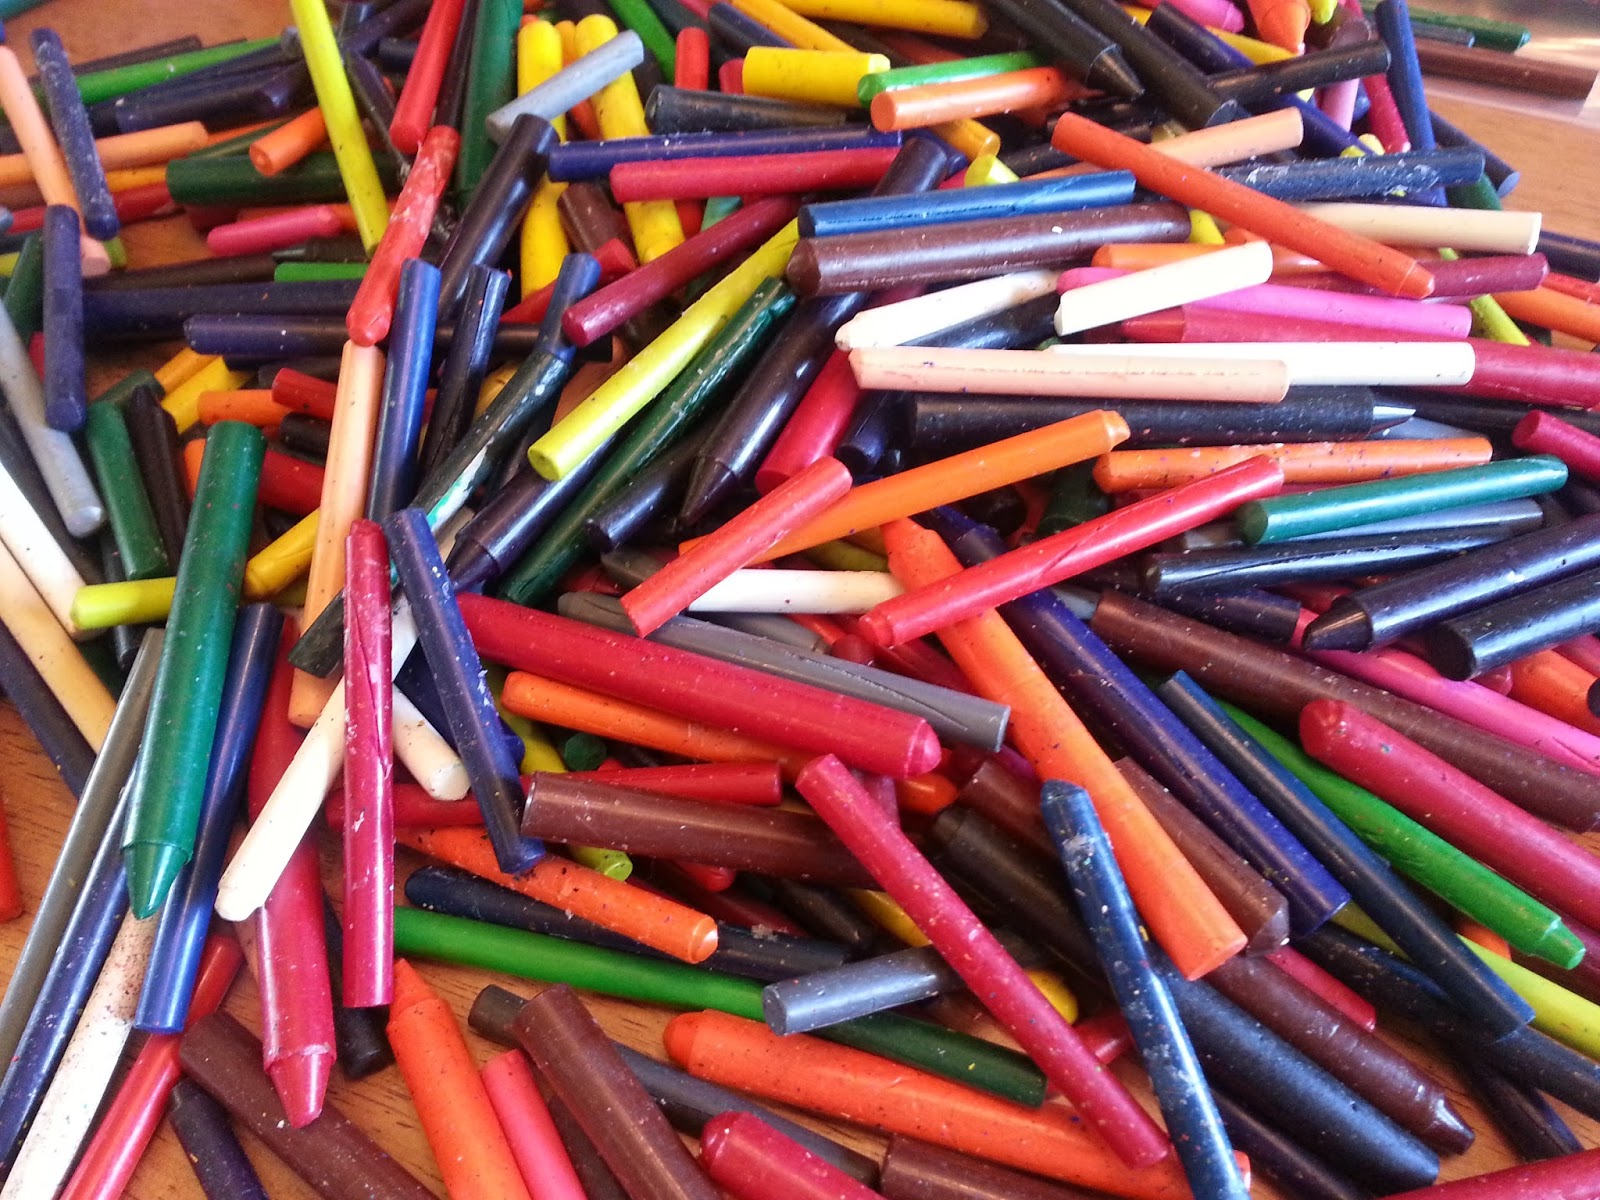
Students can peel the paper wrappers from the crayons by hand (Crayola crayon wrappers peel cleanly, while other brands leave adhesive residue), or classroom volunteers can use exacto knives to quickly slice through and remove the paper.  At least two-thirds of my students relocate at the end of each school year.  Since their families prefer to NOT worry about where crayons might end up, melted and messy amongst their household goods, I end up with two or three LARGE ziploc baggies full of crayons each May:


Having an almost fourth grader in my house means that sorting crayons is a quick and easy job.  After looking through the silicone molds that I have, we decided to make star and heart crayons.


I've found great tutorials on making crayons using metal muffin tins, but I like the different sizes and shapes that are available in silicone molds.  I find my molds at Joann Fabric and Crafts or Michaels, and always use a coupon to get them for at least 40% off.  When you're looking for molds, make sure to NOT use plain ice cube trays: you need molds that are oven safe:


You'll need to break or chop your crayons into smaller pieces.  I've found that pellet size, about a quarter of an inch wide works best, especially when you're filling smaller molds.  I put a sheet of parchment paper down over a sturdy cutting surface, and use a large knife to cut same size crayons: I don't try to cut fat crayons with normal sized ones as it makes the knife wobble.  Safety first!


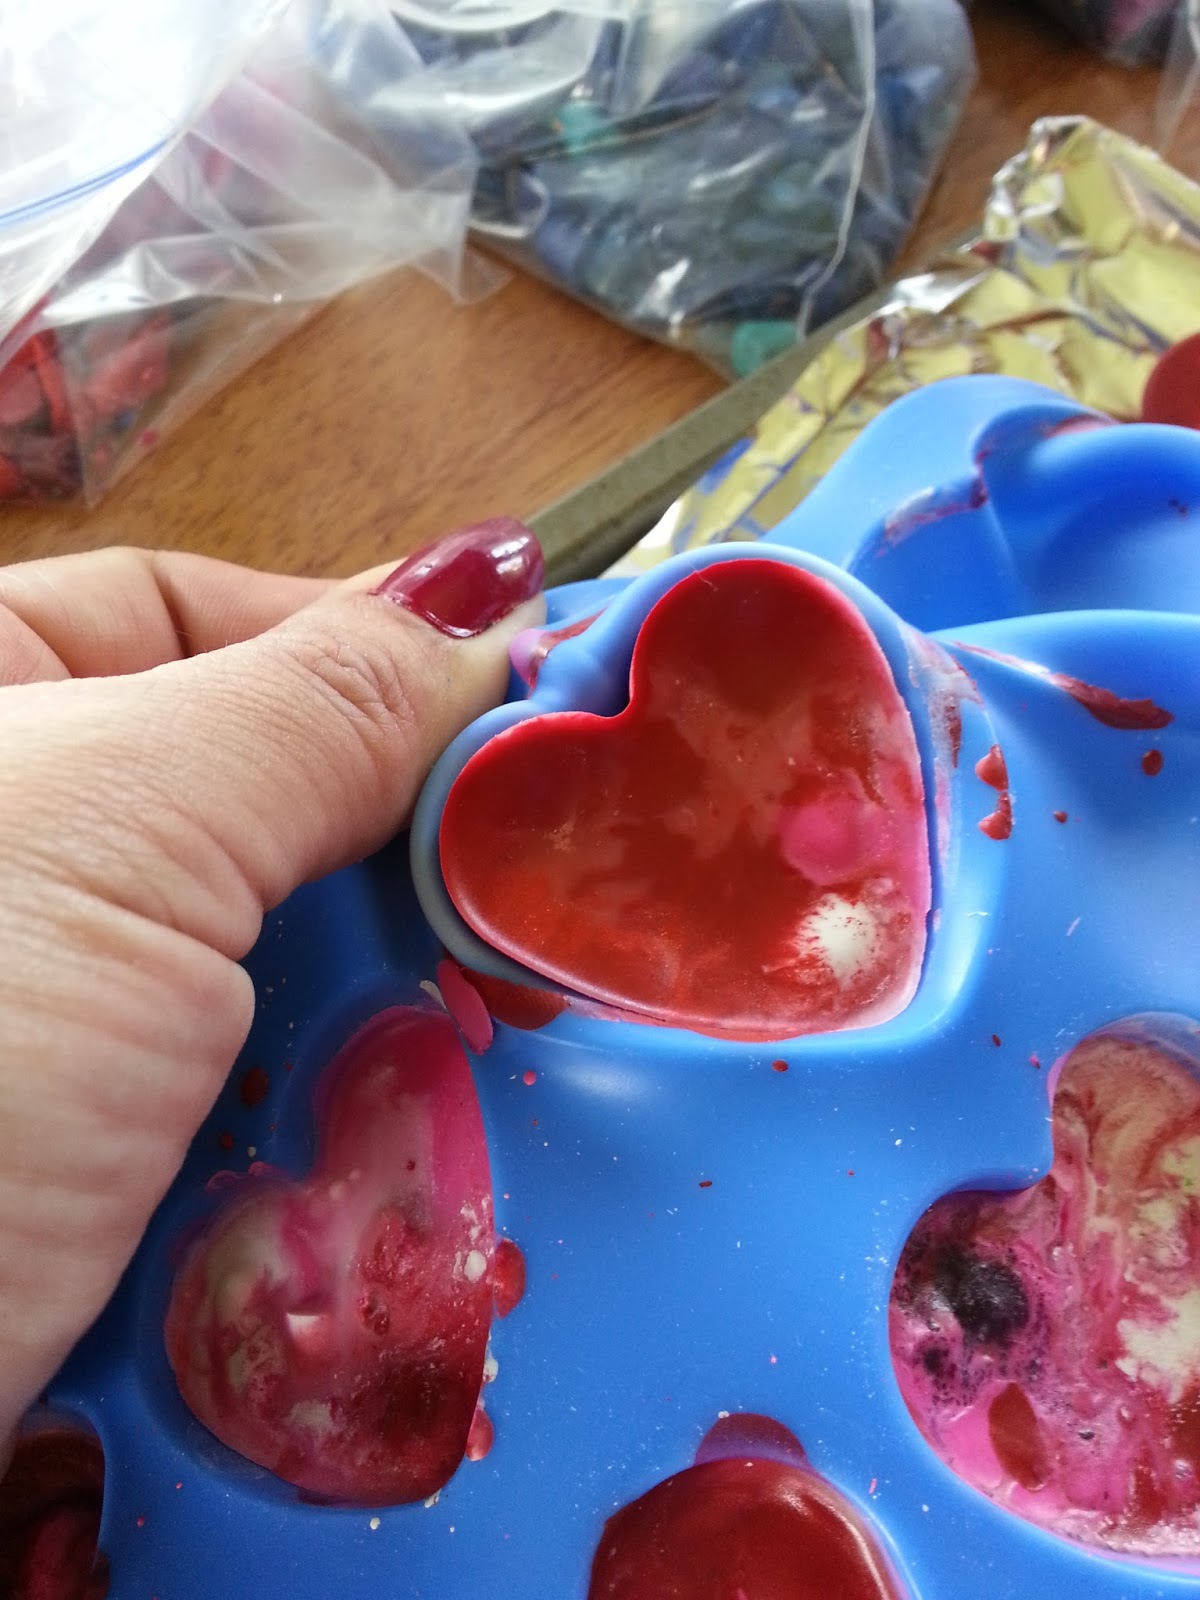
My son and I decided that we'd like our hearts to be red, white and pink.  Cut slowly across each crayon, applying pressure to the tip of the knife, then pressing slowly down as you lower the blade across each crayon to the back of the blade.  No slicing and dicing sous chef action here: s-l-o-w is the way to go.


 Once you have a pile of crayon bits, it's time to fill your mold.  You DO NOT need to use a releasing agent or cooking spray on silicone, but you will also NOT want to use the mold for anything other than crayons once you've used it for this craft. Crayon wax will remain in the mold.  Fill each cavity to the top (or even overfill, just a bit).  When the wax melts, the height of the crayons once cooled will be about 2/3 the height of the original mold.

I line a metal cookie tray with aluminum foil, and then place the mold on top of it.  The foil catches any loose pieces of crayon that might fall or melt onto your tray.


Preheat your oven to 275 degrees fahrenheit. Depending on the depth and size of your crayon molds, baking time will vary from 10-15 minutes.  The heart shaped crayons took twelve minutes to melt in my oven.  Later, we made star shaped crayons whose molds were bigger and deeper.  It took fifteen minutes for those crayons to melt.


 The crayon pieces retain their shape for quite a long time in the oven.  Look how shiny they are!


When you take the mold from the oven, you might find the edges of each cavity fully melted, with chunky bits left in the center.  You can put them back in the oven for another minute or two, but it's fine to carefully push down the center with a toothpick.  You'll see liquid wax fill in over those pieces.


Don't stir or over-mix the wax.  You want the colors to remain intact.


You can let your crayons cool to room temperature, but you can also hurry them along a bit by putting the entire tray in the refrigerator on an oven mitt.  These stayed in the fridge for twenty minutes.


Time to start popping the crayons out of the molds.  The silicone is flexible.  You'll be able to push the crayon up from the back, even peeling back the sides of the mold.


Never fear, the mold will return to its regular shape with some pushes and pokes.  It comes ~this close~ to giving you the same rush that popping bubble wrap does.  Well, almost.


Ready for more crayon bits!


I love how the heart crayons turned out.  Instant valentine treat for my students, or my son's classmates!


I've made star shaped crayons for my students for several years now.  These mold cavities are larger and deeper.  We still stuff them full to the top, making sure that each point on the star is filled.  Remember, when the wax liquifies, it sinks a bit and settles lower than the lip of the mold when cooled, so you want these crammed full of crayon bits.  My son likes to mix the colors in each mold to create marbleized crayons.


These took fifteen minutes in the oven, but were still cool enough to remove from the mold after twenty minutes in the fridge.  Now I have a class set, and plenty of heart shaped crayons too!


Fun-shaped crayons are enjoyed by kids and adults of all ages, though I wouldn't tell a student to "stay in the lines" when using them.  My students love to slide the larger star crayons across white paper, creating a marbleized background for collages.

*****

P.S. The Almost Fourth Grader made Christmas tree shaped crayons for his classmates last winter for their gift exchange using the green mold in the first photo.  He filled the main part of the mold with green crayon bits, the very top with yellow, and the bottom with brown.  Beyond cute, I tell you.


Tuesday, June 23, 2015

Need a New Source of Classroom Inspiration? E-t-s-y !

It's summer, and if you're like many teachers, you're ready to track down new and inspiring resources and design elements to help create the perfect learning environment for your students... or you're still catching up on naps.

Whether you're taking part in book studies, sales shopping, or attending conferences, the thought of tackling furniture arrangements and bulletin board displays will eventually cross your mind.  If you're anything like me though, you'll notice that trimmers, anchor charts, and manipulatives featured in teacher stores and catalogs have all started to look alike, no matter the animal, super hero, or polka dot pattern used.

They're tried and true stand-bys, and I'll appreciatively admit that Bordette corrugated trimmer has ~saved~ my bulletin board displays on more than one occasion, but if you're wondering what else might be out there (and you're the creative sort who isn't afraid of scissors, a glue gun, Mod Podge or printing in color), I've got the perfect place for you to find fresh inspiration:


Oh yes, take a gander at art prints, bunting, printable posters and manipulatives available on Etsy, and let your imagination, creativity, and craftiness be inspired.  I've created a treasury of items that caught my idea for classroom consideration here


How about these?  Teaching in Kansas, The Wizard of Oz is one of my favorites.  Illustrations, typography, and textural elements can all contribute to the feel and comfort of our students' learning spaces.


You can join Etsy for free, and search to your heart's content.  I use terms like "art print," "bunting," "classroom decor," "teacher gifts," "quotations," and "nursery" when I'm on the hunt for ideas.

Where else do you find inspiration for your classroom?  The great outdoors?  Museums? Travel?  Movies or television shows?

Tuesday, January 13, 2015

Circle Marks the SPOT

Like most kindergarten teachers, I have quite a few wigglers in my class.  For the most part, the wiggling is appropriate and safe, but every so often...

No.  Scratch that.

OFTEN... ~one~ of my friends can not (will not?) stay in a spot when excessive wiggling is a huge distraction and safety issue.

Calendar... wiggle-wiggle-scootch-scootch.

SMART Board... wiggle-scootch-scootch-bonk.

Criss-cross-applesauce at story time... wiggle-stand-jump-drop-scootch-scootch-bonk-BASH-scootch-scootch-scootch-kick-a-finger-plop.  

Scootch scootch.

This friend is fun loving, sweet, eager, mischievous and is wired to need full contact EVERYTHING.  But the rest of my friends (all twenty of them) prefer their space un-invaded, their fingers un-smashed, and their bodies and booties un-kicked.

If we give our friend too much space near the back of the group, the range of motion and sheer square feet of space that end up being used, explored, bothered and crashed into increases exponentially.

I don't do carpet squares (but used to, years ago), and I'd rather not have to put tape down on the carpet that will end up getting sucked into the vacuum each night.  We've reached the point where my friend is going to have to compromise a bit and try to keep himself restrained and contained for a longer amount of time while we hope he comes to the realization that at school he'll need to share his space with his peers in a way that is safe for all, even if he has acres of space available elsewhere.

Discovering "Sit Spots" in our music teacher's room, I inquired about their price, durability, and ease of removal/relocation.  Imagine my surprise when she pulled one up with the telltale rrrrrriiiiiiiiiip sound of velcro! Inspired, I quickly got online and checked out the products available, experiencing a sinking feeling when I saw the price and realized I didn't have it in my budget to immediately order a set for classroom use.

But I'm a crafty sort, yes sir-ee Bob, and here's what I used to make my own circle-marks-the-spot tools:

Construction paper
Laminating film
The rough side of hook and loop adhesive tape (velcro)

I cut out different colored circles (though my friend's will all be the same color), roughly four or five inches in diameter, and laminated them using my desktop laminator and 3mil film:


I cut out the circles, leaving 1/4 inch border of lamination around each, and then affixed a strip of the ROUGH loop (not the soft, fluffy side) velcro to the back.


Here's what they look like in a row on our carpeted floor:


And best of all, they don't really stick to the carpet until you get them exactly where you want them, and then press down firmly to work the rough loop velcro into the carpet's surface:


Firmly stuck, easy to see, simple to move.  Since I don't teach 400 + students like our music teacher, I'm hoping my spots are durable enough to get a lot of use out of them for the remainder of the year.

Wish me luck as I introduce my friend to Circle-Marks-the-Spot!

Thursday, November 13, 2014

Teacher Tip: Use Your Desktop Monitors and Interactive Whiteboard as Anchor Charts

My students and I LOVE using our interactive whiteboard, but there are times when it's apparent that it has taken over a substantial portion of my dry erase/display area, and others when we have so many items open that scrolling through them all without accidentally clicking them closed takes a bit more time than what we'd like for a quick filler activity.  Not wanting to have to work through seven clicks to open a file, or fill the screen with zillions of little icons, I sat down and determined what kinds of content I'd like to have readily available for transitions: letter naming, number identification, plane and solid shape review, and sight word practice.  Finding cute and appropriate clip art, photos, or available wallpaper/desktop patterns online can easily fill a weekend, but it's ~worth it~.


(If anyone knows the source of this adorable autumn image, 
please let me know so I can give credit where it's due!)


Popping the pile of autumn leaves into a Word document, I added a text box and typed in our second quarter sight words.  I like to save documents like this as PDFs so they don't get altered, but I also keep a copy in Word, and take a screen shot when necessary.  Using the new image as the wallpaper on our SMART Board ~and~ on our desktop computers gives my students multiple opportunities in small and large groups as well as individually to quickly review and practice whatever is displayed. 


I too, can quickly reference a targeted skill without having to search, click, open, and wait.  I change the desktop/SMART Board wallpapers by month, but can also have a different image on each of our five desktop computers if I need to differentiate during centers.


How else can teachers and students use the valuable real estate space found on interactive white boards and desktop computers?  Comment below and share your ideas!


Wednesday, July 09, 2014

Teacher Tip: Media Cart Modification

Occasionally, teachers no longer want or need a particular piece of furniture or equipment.  I inherited a gray metal book cart in May, first-come-first-serve style.

That's right, I jogged walked safely (yet quickly) up the hallway to retrieve it when the teacher sent out the come-and-get-it email.

Mobile vertical storage comes in handy for kindergarten students.  Materials can be rolled to different parts of the classroom or hallway, and the backside of the cart, with a teeny tiny modification, can become an additional display surface.


This year, I want to hang chart/writing paper tablets on the back of the cart.  Heavy duty magnet clips worked for one chart, but they weren't strong enough to hold two.  Hello Command Hooks!  I chose the style with the metal hook and bead since I figured they'd fit through the holes that are punched through every page of the tablets.


I positioned the chart tablet where I wanted it to hang, and slid a hook into the backside (without removing the clear strip from the adhesive) so I could determine where to anchor the hook.  Once I knew where it needed to be, I marked the bottom of the white plastic against the metal with a pencil, and then removed the clear strip.  Carefully positioning the hook, I pressed it firmly against the cart.


With the first hook attached, it was time to determine where the second would need to be placed so that the chart hung evenly.  I put one side of the tablet onto the already mounted hook, and then the other on to the second, with the clear strip still in place.  The adhesive on Command Hooks is STRONG, so you're not able to reposition them easily once they make contact.  Sure, you can pull the release tab and try again, but then you've wasted an extra adhesive strip when it wasn't necessary.


(The cart still needs some spray paint to cover up the scribbles that someone else added in order to label the cart.  Sigh.)

Ta-da!


Now the cart is perfect for mobile display and storage, and can also be an activity divider between learning centers.

~Spray paint, spray paint, spray paint.~

*****

What kinds of modifications do you make to equipment in order to make it more functional for your classroom?  What items have you repurposed to create learning materials for your students?